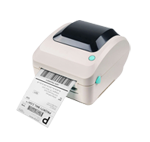
Please follow the video instructions for how to connect the printer's power connections, connect printer with computer, and load labesl into the printer compartment.
If your printer model has WiFi, Bluetooth, Ethernet/LAN, or Auto-Peel please see the options below for detail on how to further set up the hardware.
If your model is USB only and label calibration has been done, then proceed to Step #3 - Driver Setup.
If label calibration has been done, then proceed to Step#3 - setup the driver .
Mac, Chromebook, and Linux
After you have the power cables connected, the USB cable connected to the computer, and labels loaded into the paper compartment (see All Models step above), then please proceed by using the online tool below to join the Arkscan printer to your WiFi network.
NOTE: A USB connection is required to perform the initial setup of the printer.
You will need to use our online printer tool to get your printer joined to your WiFi network (NOTE: Chrome browser is required to use the online tool). Please use the video button below to watch how to connect your WiFi-Enabled Arkscan printer to your network using the online printer tool.
After your WiFi printer is connected to your network, please continue to Step #2: Calibration or if the printer is already calibrated then Step #3: Driver Setup.
Instructions to RE-CONNECT your WiFi printer to the WiFi network due to network configuration change, hardware change, or printer lost connection. These steps are for Mac ONLY - ▶ Please watch video instructions here
Windows Computers
Start by having the power cables connected, USB cable connected to the computer, and labels loaded into the paper compartment (All Models step above).
NOTE: USB connection is required to perform the initial setup of the printer.
You will need to use our printer tool to join the printer to your WiFi network. Please use the video button below to watch how to how to get the tool, and how to connect your WiFi-Enabled Arkscan printer to your network.
After your WiFi printer is connected to your network, please continue to Step #2: Calibration, or if the printer is already calibrated then Step #3: Driver Setup.
Instructions to RE-CONNECT your WiFi printer to the WiFi network due to network configuration change, hardware change, or printer lost connection. These steps are for Windows ONLY - ▶ Please watch video instructions here
Introduction:
PLEASE NOTE: This method of printing is not recommended for general use, as it is designed for specific scenarios. For most users, it is recommended to use the other WiFi model method above this one.
It is possible to connect to the printer's WiFi signal directly instead of connecting it to an existing WiFi network and then printing through the network. However, this method has some advantages and disadvantages that should be considered.
Pro's:
- Flexibility: Direct Wi-Fi connection allows you to print from any device that supports Wi-Fi, without being restricted to a specific network.
- Ease of Setup: Connecting directly to the printer's Wi-Fi signal can be quicker and easier to set up compared to joining an existing network.
Con's:
- No Internet: When connected to the printer's Wi-Fi, the device will not have internet access. Therefore, labels must be generated or obtained on the device directly. Alternatively, label contents will need to be pre-downloaded onto the device before joining the printer's network.
- Limited Amount of Connections: Only one device can connect to the printer's Wi-Fi at a time to print.
Setup:
1. First, please set up the printer hardware by loading the labels into the printer and attaching the power cables (see All Models step above for detailed info).
2. Power on the printer so that there is a blue light on top
3. On the device that you want to print from and connect to the printer's WiFi, go to the device's WiFi connection settings, and connect to the 'ARKSCAN-2054K' (this name will vary slightly depending on which Arkscan model you have)
4. The WiFi connection will request a password. To obtain the WiFi password you will need to print a self-test/configuration page from the printer. You can do this by holding down the button on top of the printer until the light flashes purple, and then letting go. More information about this process can be found using this link.
5. After the Self-Test/Configuration Page is printed, refer to these lines of information on the printout:
- WIFI PIN: (this is the password to connect to the printer WiFi)
- WIFI AP IP: (this is the IP address of the printer. Depending on your device this may be needed for the driver setup or app)
6. Please proceed to Step #2: Calibration to perform a label calibration of the printer. Once the calibration is done, move on to Step #3: Driver Setup to learn more specific information about how to print a label from your particular device (iPhone/iPad, Android) or Operating System (Windows, Mac, Chromebook).
NOTE: Here's a very simple guide on how to set up your device based on its type. Please see our Driver Setup Page for more details.
- Windows Computers: During the driver installation, select Create New TCP/IP port, when prompted enter the WIFI AP IP info from the Self-Test/Configuration Page
- Mac Computers: The driver installer will auto-detect the WiFi printer, and list it in the Printers & Scanners list in System Preferences
- Android devices: Our EZlabel app will auto-detect the WiFi printer and list it in the app to print. If not, manually add the printer by entering the WIFI AP IP info from the Self-Test/Configuration Page
- iPhone/iPad: Our EZlabel app will auto-detect the WiFi printer and list it in the app to print. If not, manually add the printer by entering the WIFI AP IP info from the Self-Test/Configuration Page
To setup your the auto-peel function of your printer, please watch video instructions below
If label calibration has been done, then proceed to Step #3 - Driver Setup.


