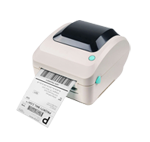
To set up the hardware for an Arkscan 4x6" shipping label printer and load the shipping labels, follow these steps:
1. Prepare the necessary parts:
- Label printer
- Shield
- Rod
- Power adapter
- Power cord
- USB cable
- Roll of 4x6" labels (such as SL450 from Arkscan)
2. Connect power cables:
- Plug the power cord into the power adapter and ensure a snug fit.
- Connect the power adapter to the power input on the back of the printer. The power adapter's LED light should turn green.
3. Power on the printer:
- Press the left side of the power switch down. The printer will beep, and the LED light will be solid blue.
4. Connect the USB cable:
- Insert the Type B end of the USB cable into the printer's USB input.
- Plug the Type A end into the computer's USB port. If the computer only has USB-C ports, use a USB-A to USB-C converter.
5. Load labels into the printer:
- Insert the rod through the paper roll and slide a shield onto each end.
- Open the printer cover and insert the rod into the printer's grooves.
- Ensure the paper roll is centered using the measurement markings.
- Load the labels with the sticker side up.
- Pull the first sheet out of the roll and place it between the green sliders.
- Close the lid, ensuring a solid click. If the light on top is solid red, lift the lid and push it down until it clicks again.
6. Verify proper setup check:
- The printer should be powered but in standby mode (solid blue light).
- The labels should be loaded correctly, with the first sheet ready to print from the printer.
A Detailed Instructions can be found in YouTube tutorial below: